DIY Easy Shoe Box Organizer
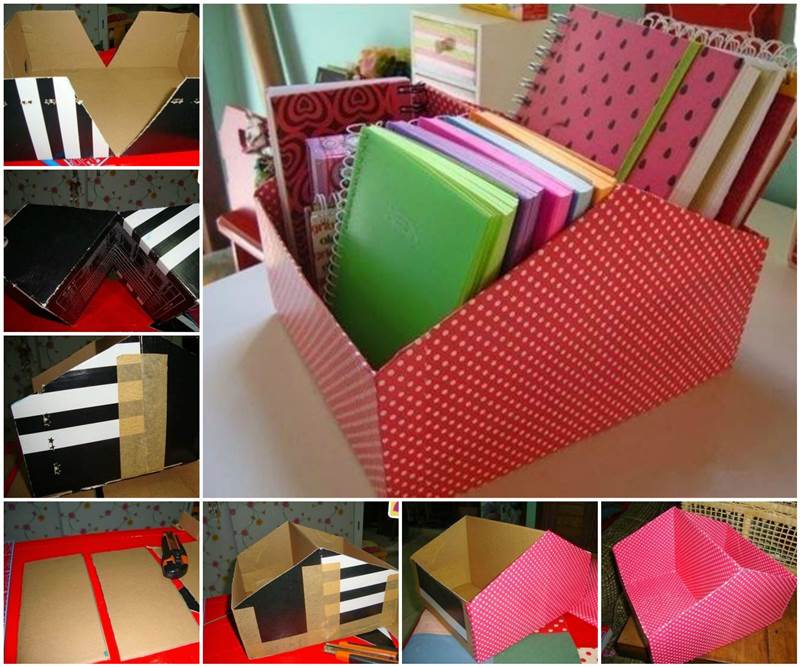
How do you usually do with your shoe boxes? I just put them in the recycle bin or use them as regular storage boxes for documents, sewing stuffs, accessories and so on. But with a little bit of transformation, you can reuse them in a new and interesting way. Here is nice DIY project to make an organizer from a shoe box. It is super easy to make. The result is this pretty organizer that you can use to put away your books, notebooks and files. You’ll be rest assured that everything will be organized and looking good. You can wrap it with your favorite patterns and colors of paper or fabric, or add any ornaments if you like. Let’s get started!
What you need:
- A shoe box;
- Scissors or knife;
- Cardboard.
- Ruler;
- Wrapping paper or fabric with colors and patterns of your choices;
- Glue;
- Tape.
How to do:
- Take a shoe box and cut out a triangular shape on both sides.
- Bend the shoe box in the middle and make two sides meet together.
- Secure with tape and glue.
- Measure the size of the organizer and create two pieces of cardboard as the sides for the organizer. You may use another shoe box for the cardboard.
- Attach the two pieces of cardboard to the sides of the organizer and secure with tape.
- Cover the entire organizer with wrapping paper or fabric and secure with glue.
- Add any ornaments if you like.
- Place books, notebooks, files etc. inside and enjoy!